
Jupyter Notebook Tips and Improvements
Jupyter notebooks are a common but powerful tool in data science and machine learning. They allow for fast prototyping, EDA, and modeling in notebooks where code, documentation, plots, and more can be viewed all at once. That being said, it does not make its most useful features very obvious, so in this post I will go over a few ways to make the Jupyter notebook experience even better.
Multiline editing
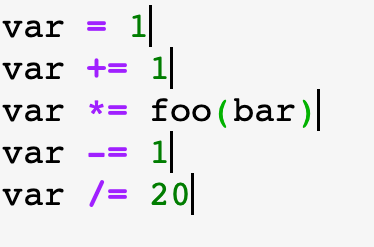
This is probably my favorite tip, as it can make some extremely tedious tasks much faster. While editing a cell, hold down Alt. The cursor should turn into a plus shape. Now clicking and dragging straight down places a cursor on each line you drag your mouse past, and dragging down+horizontally selects the same part of mutliple lines at once. As long as your code is lined up nicely, this lets you do things like change a variable name on consecutive lines quickly, comment out many lines at once, split lines, and more.
Command mode
When not actively editing the contents of a cell, the notebook is in what is known as command mode. While in command mode, you can do a large amount of cell-level editing of the notebook. You can enter command mode from edit mode by simply pressing Esc. While not exhaustive, the following is a list of particularly useful command mode commands:
-
A/B: add a cell Above/Below the current cell. -
C/X/V: copy/cut/paste current cell. -
D+D(Dtwice): delete the current cell. -
Z: undo cell deletion. -
M/Y: change the current cell to markdown or code. -
Shift+up/down: Select the current cell and the cell above/below it. -
Shift+M: merge the selected cells.
You can also press Cmd + Shift + P to bring up the command palette, where you can do all of these actions and more.
Shell and Magic commands
Shell commands can be run from inside a Jupyter notebook by simply placing a ! in front of the command and executing the cell. For example, !ls prints the contents of the directory the notebook is in, saving time if you need to reference a file whose name you have forgotten. You can also use pip and conda commands to install and manage packages directly from a Jupyter notebook.
Magic commands are statements that begin with a % that provide extra functionality outside of normal python execution. There are a large number of them, of varying usefulness depending on the application. The following are a few that I believe may be univeraslly useful:
-
%whos: display information about all global variables. This can be useful because cells can be run non-sequentially, leading to confusion about how a variable has been assigned. -
%run file.py: Runs the scriptfile.pyin the notebook. -
%%time and %timeit: Time the execution of a cell.%%timetimes one execution of the cell while%timeitruns it many times and gives more statistics. -
%load_ext autoreload + %autoreload 2: A specific usage of theload_extmagic command that makes it so if you update an external module or py file you don’t have to restart the kernel. -
%quickref: Opens a reference for all magic commands - give it a look to see if any of them that I haven’t mentioned here are useful to you!
nbextensions
While the previous sections applied to Jupyter notebooks and Jupyterlab, and to a lesser degree IDEs with Jupyter notebook implementations such as PyCharm, nbextensions are extensions to the Jupyter notebook web interface specifically. To install them, and their easy to use configurator, use
conda install -c conda-forge jupyter_contrib_nbextensions
conda install -c conda-forge jupyter_nbextensions_configurator
Note that to use the configurator you may have to downgrade your jupyter notebook. Many extensions still work with newer versions and can be installed via the command line however. As with the previous sections, there are many different nbextensions, and you can find the documentation for all of them here. The following are my personal recommendations:
-
Table of contents: adds a moveable table of contents, with section and subsections formed by different markdown heading levels. Also allows you to collapse any (sub)section, hiding code from view. Together these greatly help with notebook organization and navigation.
-
Skip traceback: hides error traceback and instead only shows the error type and short summary. Great for when you make an error while using pandas or another module with a large codebase and don’t need to see 100 of code that don’t necessarily help you fix an error.
-
Scratchpad: Adds a single scratch cell, accessible from anywere, that doesn’t affect the rest of the notebook.
-
Autopep8: Adds a toolbar button that automatically reformats code to look prettier. Only affects spacing.
Interactive widgets IPywidgets
One of the primary strengths of Jupyter notebooks is the ability to rapidly test and execute code. But if you want to execute the same code (say a function call or printing a pandas DataFrame) with slightly different arguments, you need to either make many cells with essentially the same code or rerun the cell with different arguments, which can be inconvenient. IPywidgets allows for the creation of small widgets that execute code automatically with user adjustable arguments. To install and enable IPywidgets run
conda install -c conda-forge ipywidgetsTo import the library in a notebook, use
import ipywidgets as widgets
from ipywidgets import interact, interact_manual
Now, to create an interactive widget, all we need to do is use the @interact decorator followed by a function definition.
 Essentially, the library creates controls based on the function inputs and runs the function automatically, outputting any return value. Giving a numerical argument creates a slider with an automatic range, while giving a tuple with the
 (start, stop, step) format creates a slider with defined bounds and steps. Giving a string argument creates a text field, while giving a list creates a drop down menu. If the code might take a while to run, you can instead use @interact_manual instead to only run the code when a button is pressed. These widgets can also be used in conjunction with matplotlib or seaborn to make plots with controllable x and y axes, potentially very useful for EDA.
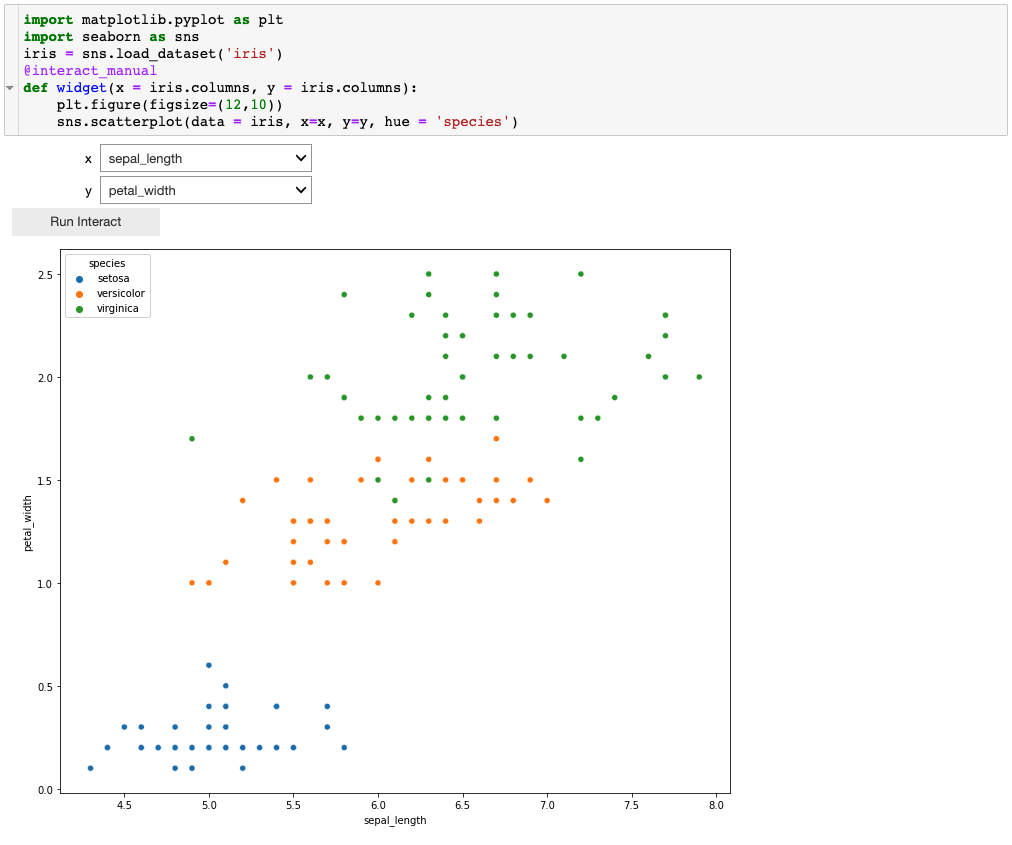 The widgets shared here are fairly simple and only meant as a starting point. Check out the documentation to see the full capabilities of the library.
Conclusion
While the tips and adjustments mentioned here have made my Jupyter notebook experience better, they are certainly not the only ones out there. If there’s an adjustment you want to make, there’s likely an extension, magic command, or config change to make it happen. Let me know if theres a change that you can’t live without, and happy optimizing!